
Device application deployment example
This article explains how to deploy device applications through JelinaCloud.
The screenshots retain existing real product materials and illustrate configuration and navigation. Device, version, and service names are example data; use values appropriate to your project.
Before deploying applications, install JelinaOS and add the device to a JelinaCloud fleet. See add a device.
Device used
Section titled “Device used”| Device | JelinaOS version | Jelinvisor version | Kernel version |
|---|---|---|---|
| I.MX8MP EBC-RS08-A2 | imx8mmebcrs08a2 Debian-10 1.0.4 | 1.0.9 | 5.4.70-g62c07ec2f origin |
Basic workflow
Section titled “Basic workflow”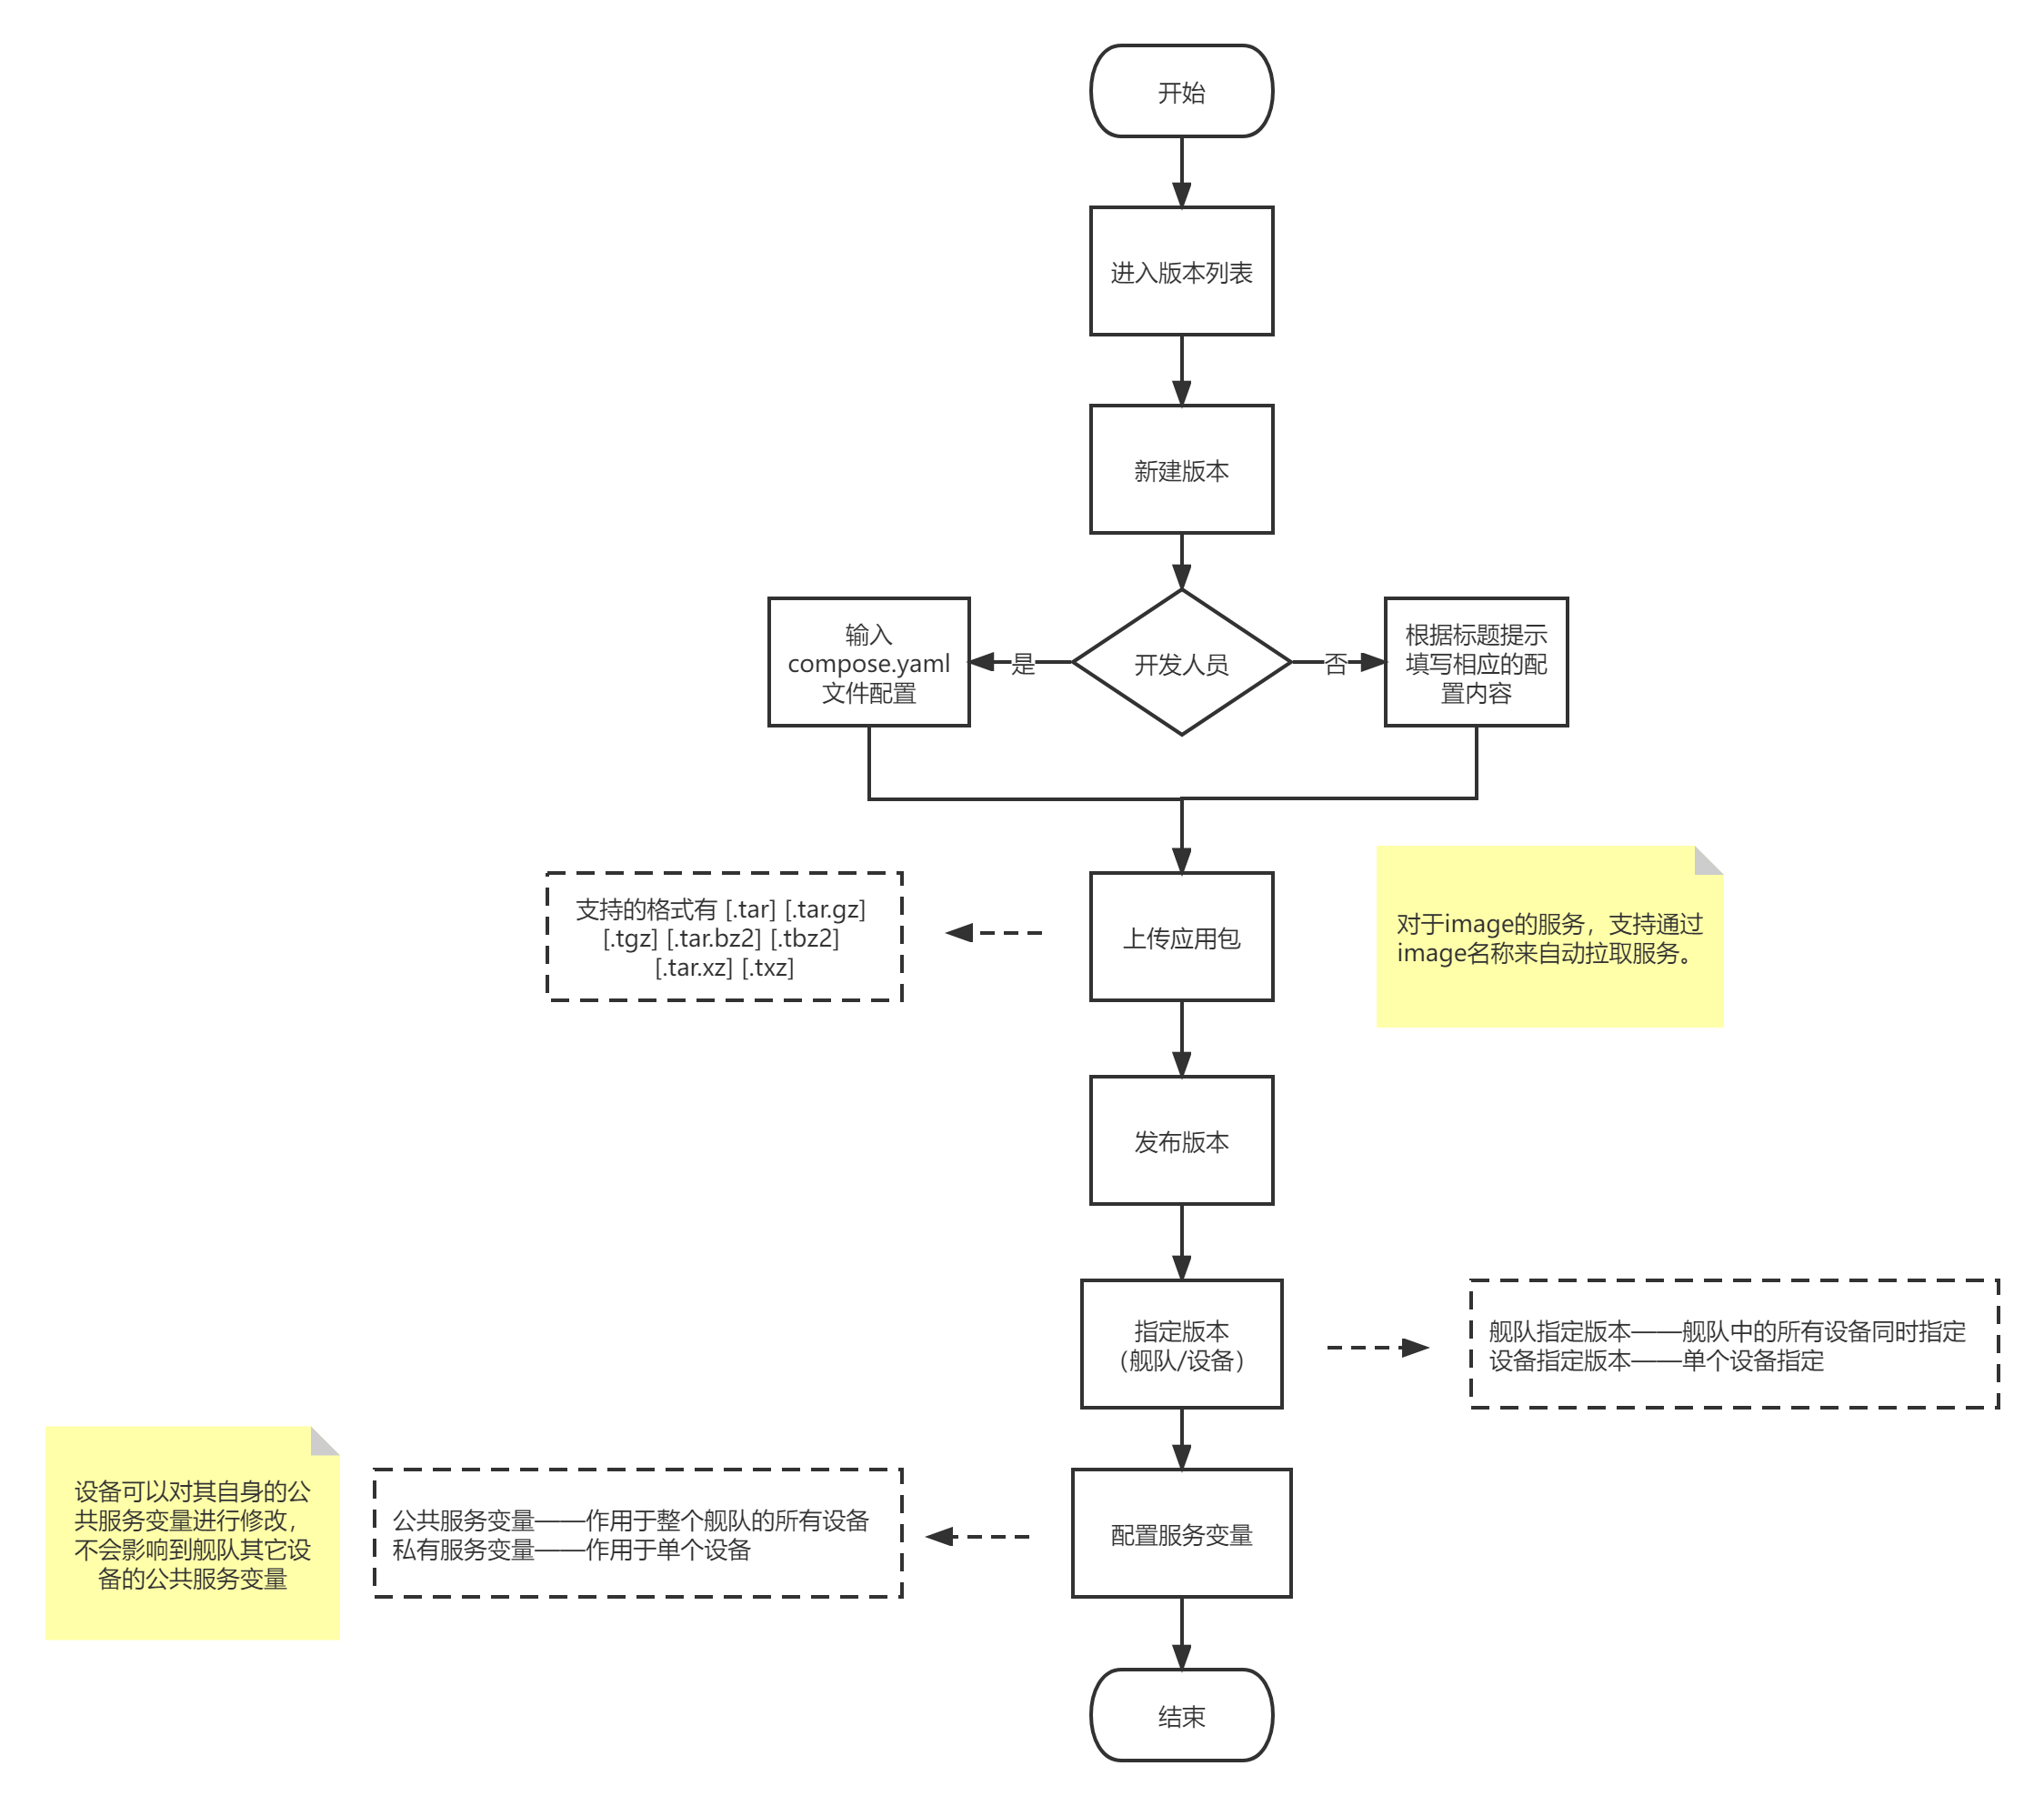
Publish a release
Section titled “Publish a release”Open the device’s organization and fleet. Select Releases → New release, choose an editing mode, and select Next to open the compose.yml editor.
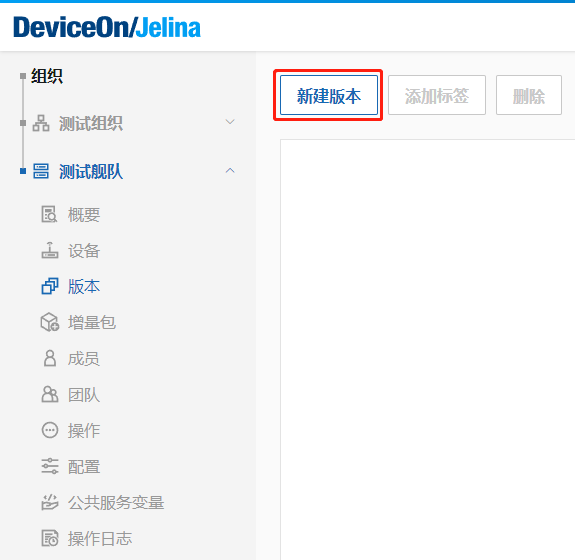
Select an editing mode:
Developer mode allows Compose editing; non-developer mode configures services through forms. Both interfaces are shown below.
Developer mode example
Write service configuration in the compose.yml editor. A single release can contain both containerized and local services. They are described separately here for clarity.
Deploy container services
Section titled “Deploy container services”Find required images on Docker Hub (https://hub.docker.com/search?q=). Refer to each image’s documentation for deployment instructions.
For example, deploy a MySQL container service:
- Write the configuration.
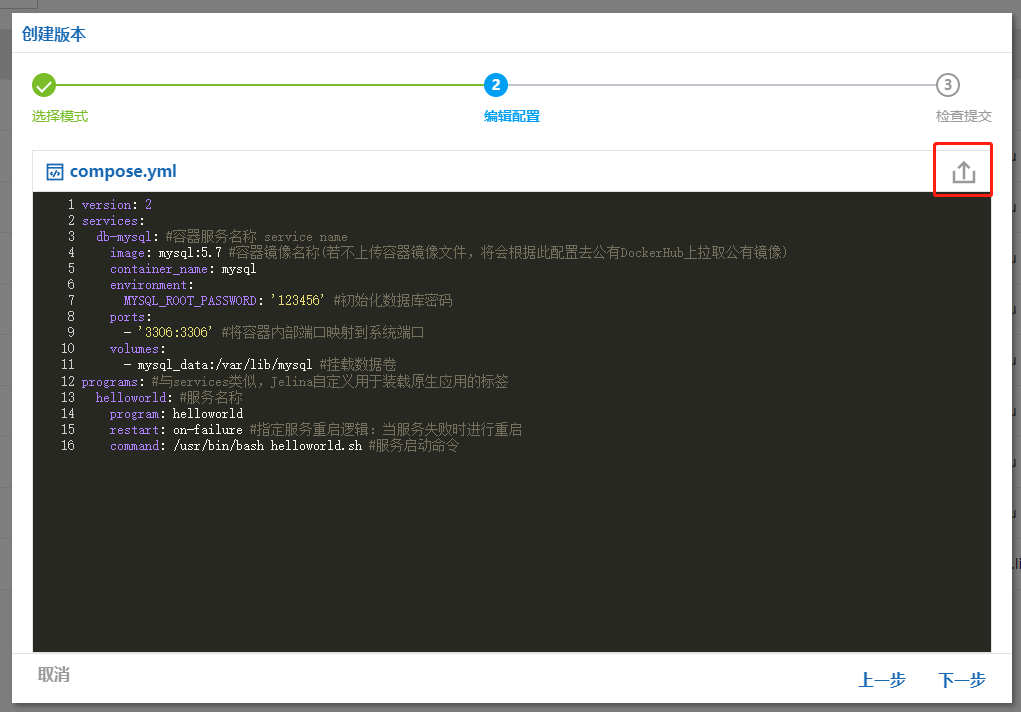
version: 2services: #Service name db: # mysql: image name; latest selects the latest image version and may be omitted to pull the latest from Docker Hub by default. A specific version can also be used, such as mysql:5.7 image: mysql:latest #Environment variables environment: # MySQL superuser login password MYSQL_ROOT_PASSWORD: '123456' #Mapped host and container ports ports: - '3306:3306'-
Select Next → Save to save the release.
-
Select the file icon in the service list to upload the packaged application file. Public images can be pulled by image name, so an upload is optional.
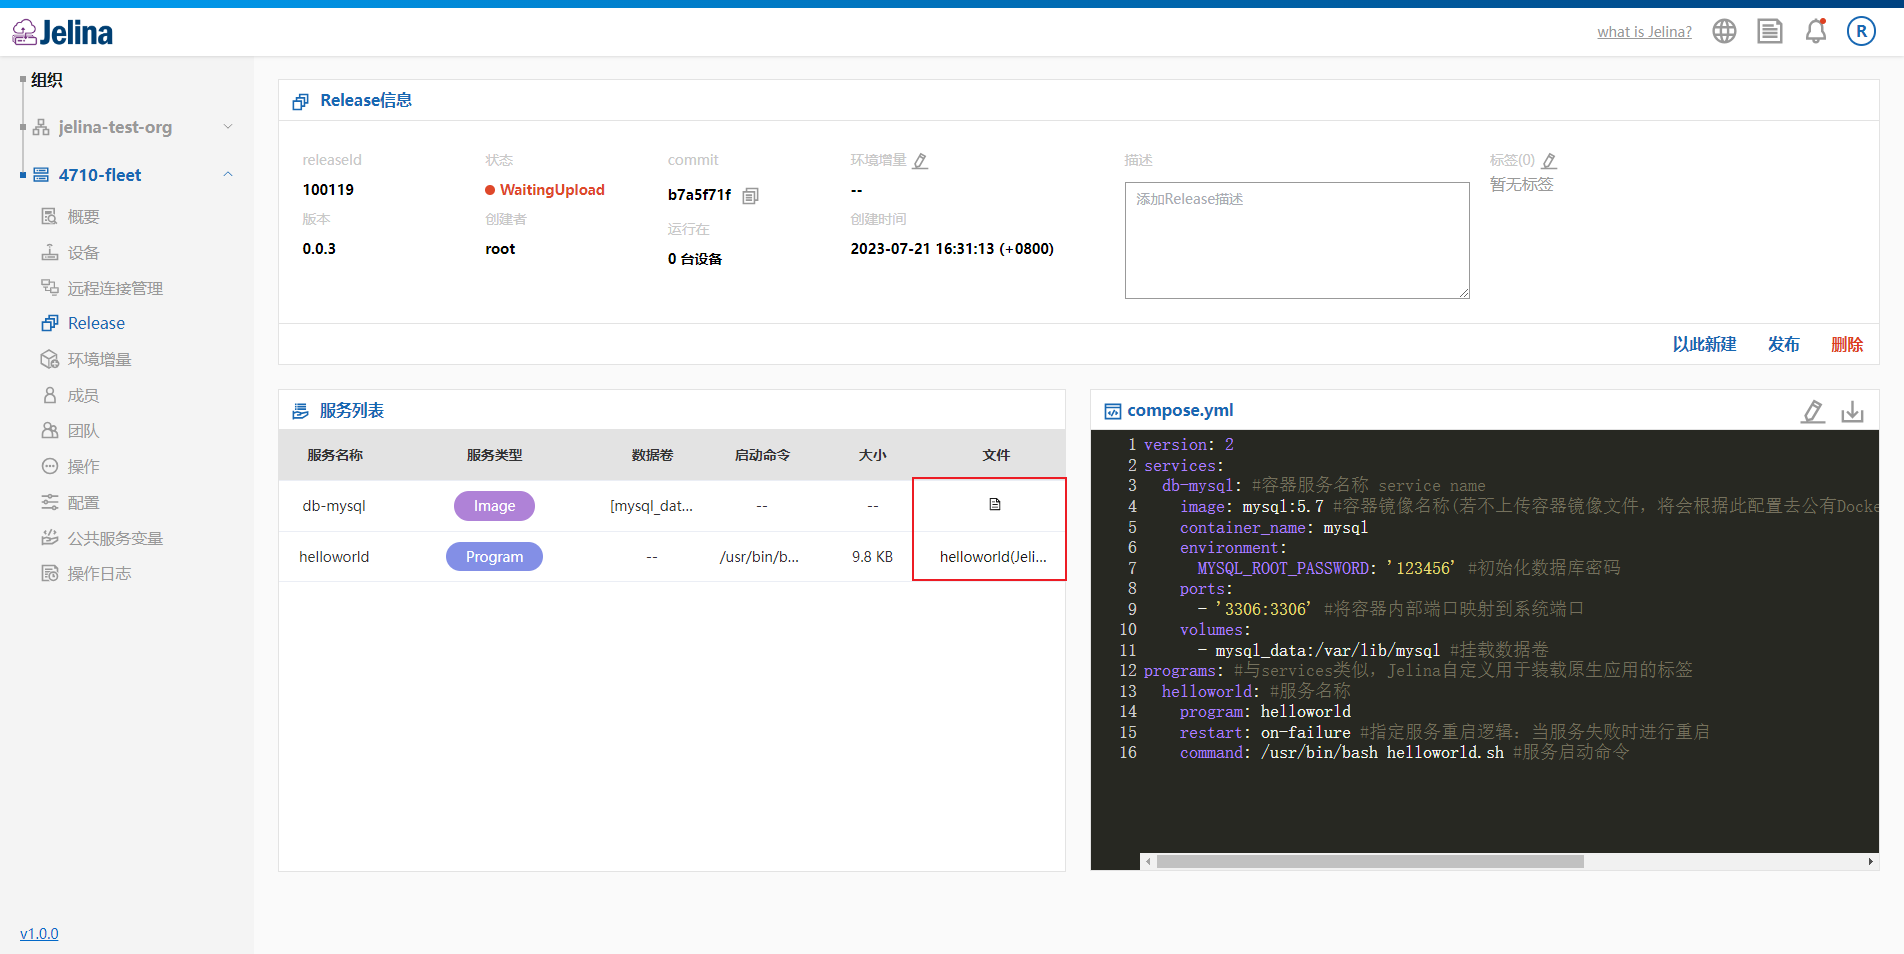
- After upload, select operation → Publish at the upper right to publish the new release.
Deploy local services
Section titled “Deploy local services”- Write a simple helloworld.sh script for testing.
The script iterates from 1 to 100. Whenever the value is divisible by 10, it prints hello world and pauses for 10 seconds. After iteration, it reads device variable name and prints its value.
#!/bin/bash#Iterate from 1 to 100; whenever the number modulo 10 is 0, print hello world and pause for 10sfor((i=1;i<=100;i++));do if [ $(expr $i % 10) == 0 ] then echo "hello world $i" sleep 10done#Read device variable name, set to jack, and print it to the console. Users set name in fleet-wide or device-private variables. See the Device configuration and service variables section belowecho "name:$name"Package helloworld.sh as helloworld.tar.gz.
- Write and save the configuration.
version: 2programs: #Service name helloworld: program: helloworld #Restart policy: restart on service failure restart: on-failure #Service startup command command: /usr/bin/bash helloworld.sh- Select the file icon in the service list and upload the packaged program.
- After upload, select operation → Publish at the upper right to publish the release.
Non-developer mode
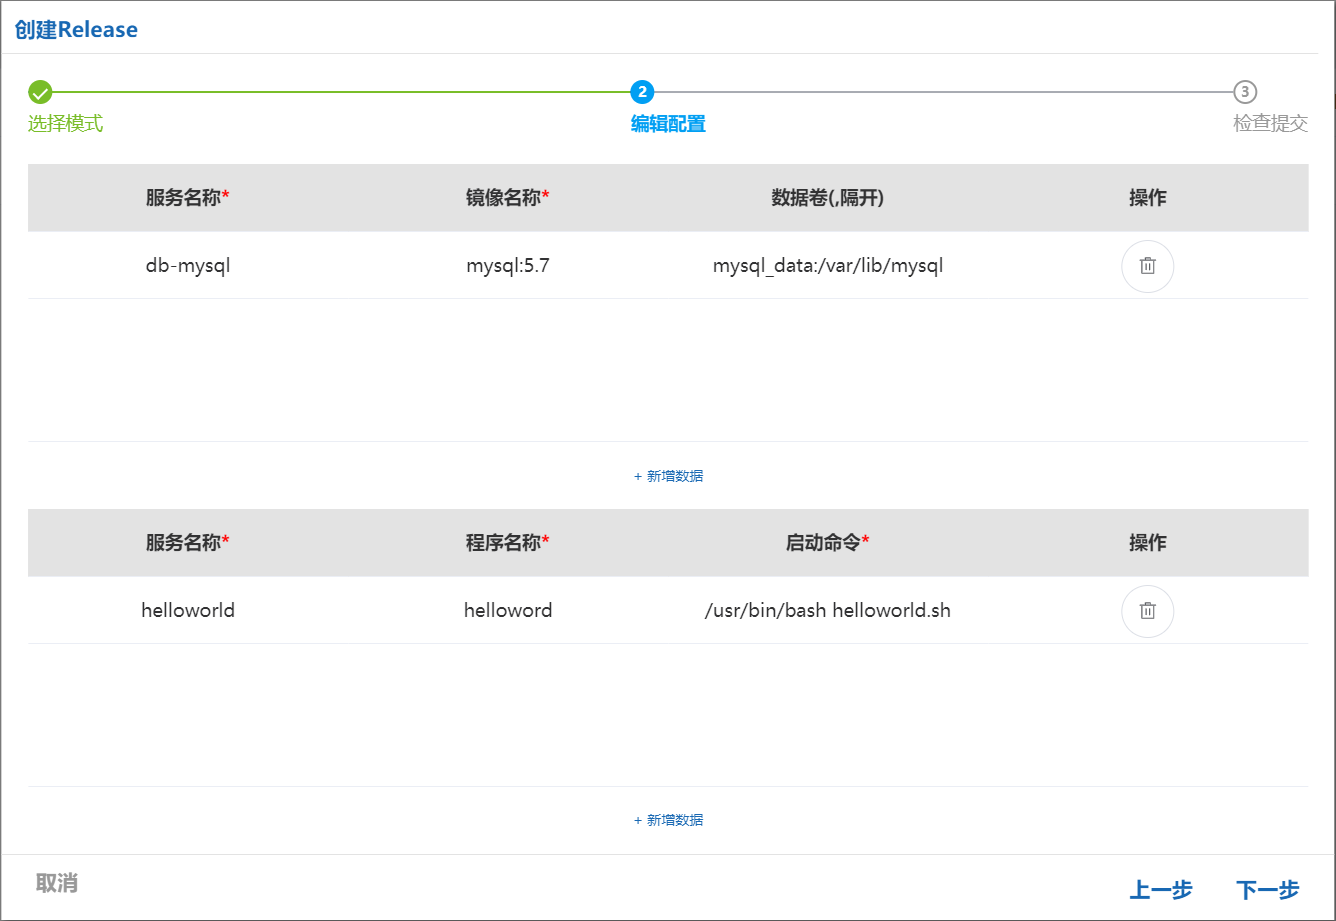
This mode is designed for non-developers. Basic service names and startup commands are sufficient to configure services:
Select Add data, double-click – to edit, and enter service configuration.
Select Next to save. Package upload and release publication then follow the same steps as developer mode.
Set the device release
Section titled “Set the device release”Fleets follow the latest release by default, but devices may take approximately 15 minutes to switch. Specify a version manually to accelerate switching.
On the device overview, select operation → Set release at the upper right. Choose the new release in the dialog and select Set release.
Verify application deployment
Section titled “Verify application deployment”Note: The device must be connected and communicating normally.
Verify in the JelinaCloud interface
Section titled “Verify in the JelinaCloud interface”After services start, check their current status in the device dashboard’s service list.
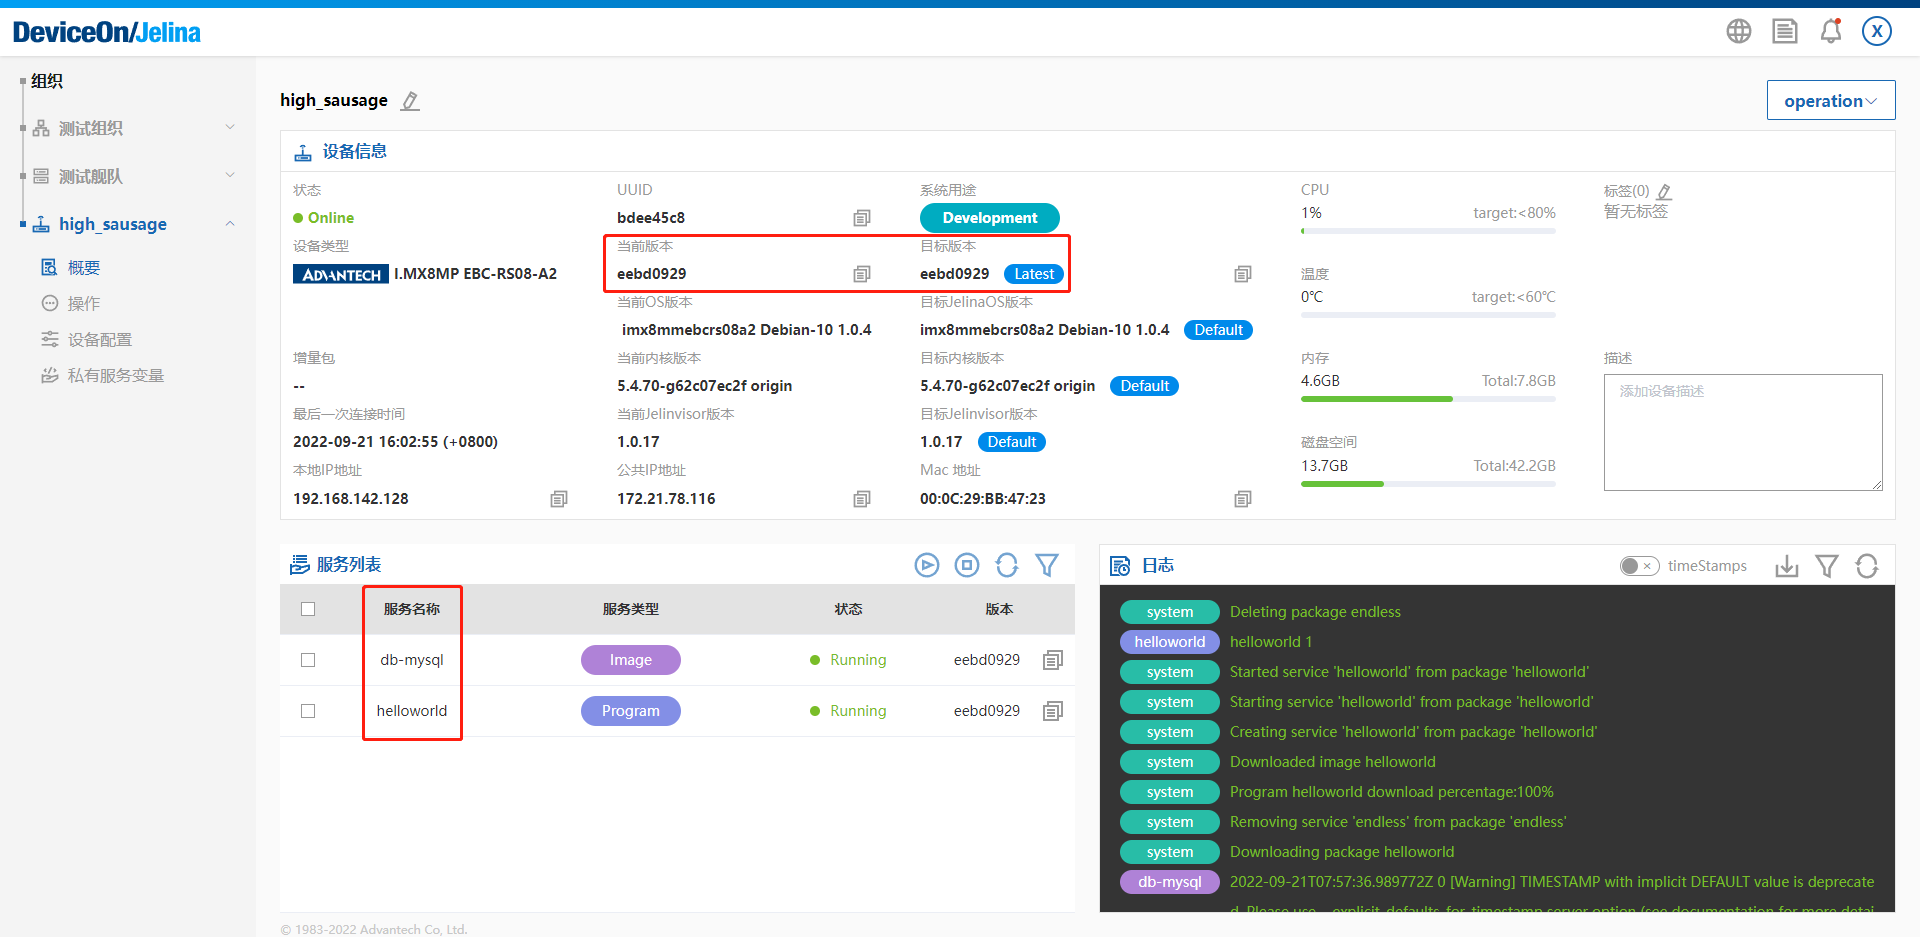
Four common states are:
- Running: The service is running.
- Failed: Service execution failed.
- Restarting: The service is restarting.
- Exited: The service has exited.
Verify on the device
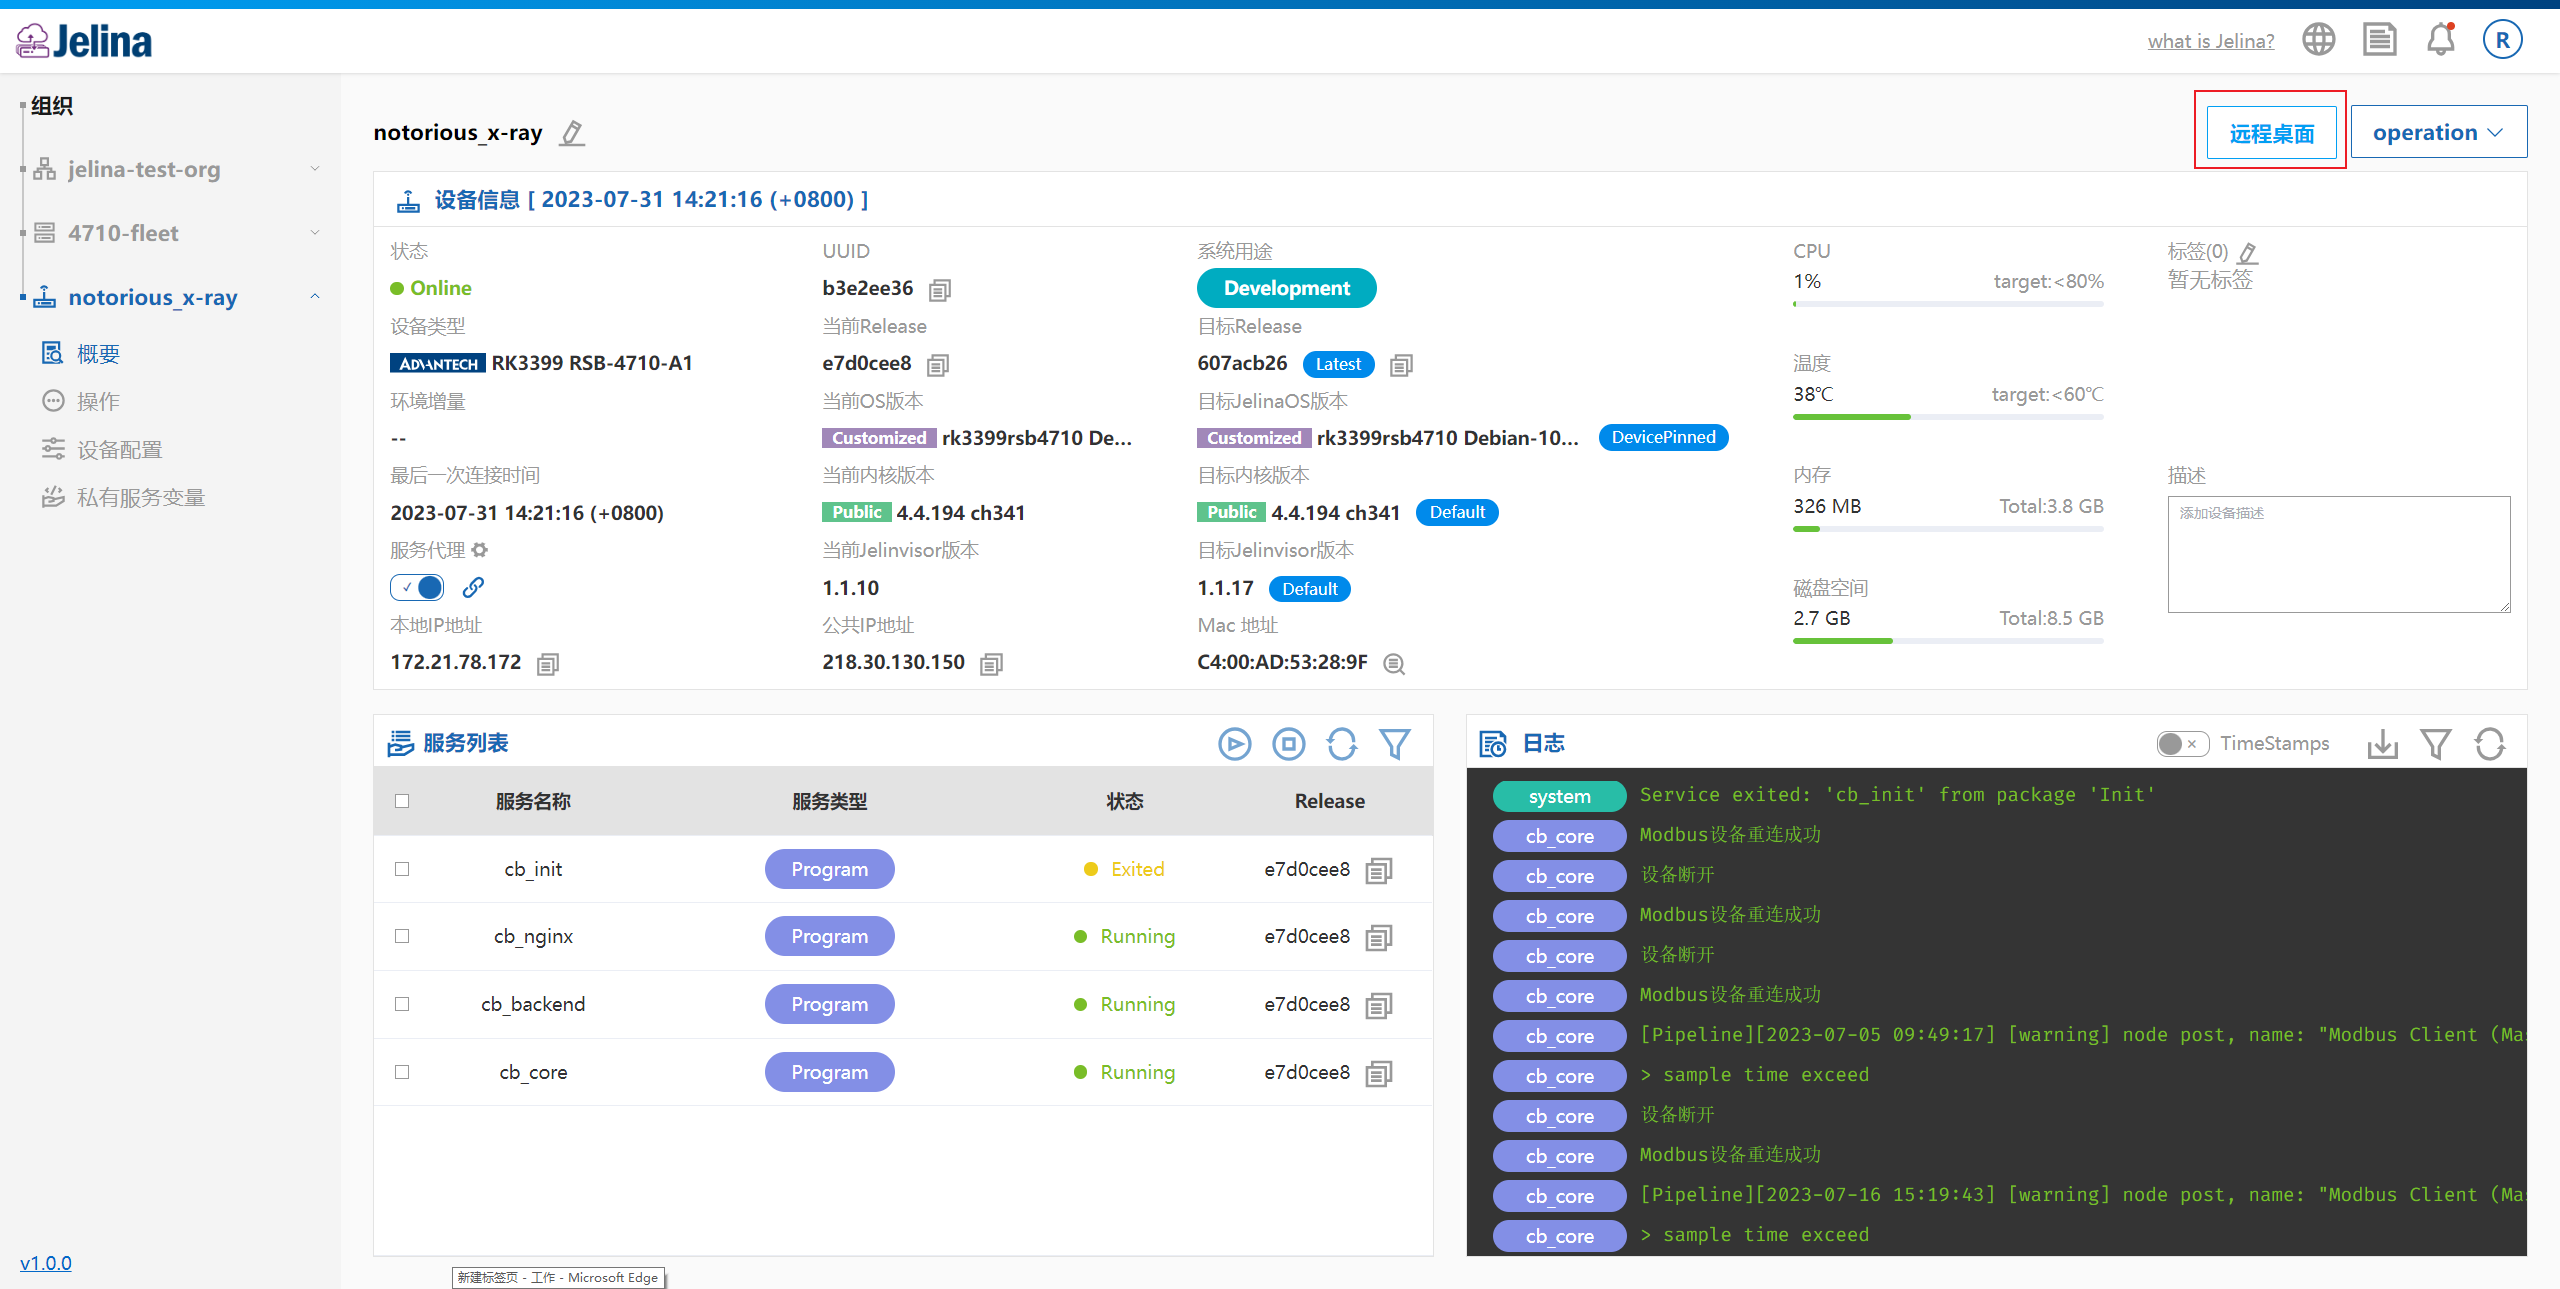
Section titled “Verify on the device”- Connect to the SSH terminal through remote access on the JelinaCloud device details page, or use an existing SSH client.
Verify container deployment
Section titled “Verify container deployment”After connecting, run docker ps to view running container services.
Confirm that the target container is listed with STATUS showing Up. If absent, investigate the target Release, image download status, and container logs.
Container names follow the format Service name _ Image ID _ Release ID _ Release Commit.
Confirm that the example db service is running.
Verify local service deployment
Section titled “Verify local service deployment”Use journalctl -u jelina-jelinvisor -f to inspect device logs and verify application status.
Check service start and exit records in the agent logs against dashboard status.
Devices report status periodically. Use the current device reporting interval and actual service state to confirm normal operation.
Verify service functionality
Section titled “Verify service functionality”Verify the MySQL container service
Section titled “Verify the MySQL container service”Open Navicat and try connecting remotely to the deployed MySQL application. Enter the device address, administrator account, MySQL administrator password from compose.yml, and port:
| Connection setting | Value in this example |
|---|---|
| Address | Reachable device IP address |
| Port | Host port mapped in Compose, 3306 here |
| Username | root, or an application user you created |
| Password | Database password in the current application configuration |
Select Test connection. A successful result confirms deployment and connectivity.
Other MySQL environment settings, such as application accounts, can also be configured through device private variables or fleet shared variables in JelinaCloud.
Verify the local helloworld script
Section titled “Verify the local helloworld script”After the local service starts, helloworld output appears in dashboard logs and in the remote console’s device output.
JelinaCloud device dashboard:
Remote console:
The following is example output from this script; numbers vary with progress:
hello world 10hello world 20...name:jackAt the end, name:jack indicates that the script read service variable name. If the value differs, check the variable’s scope and actual value.
Device configuration and service variables
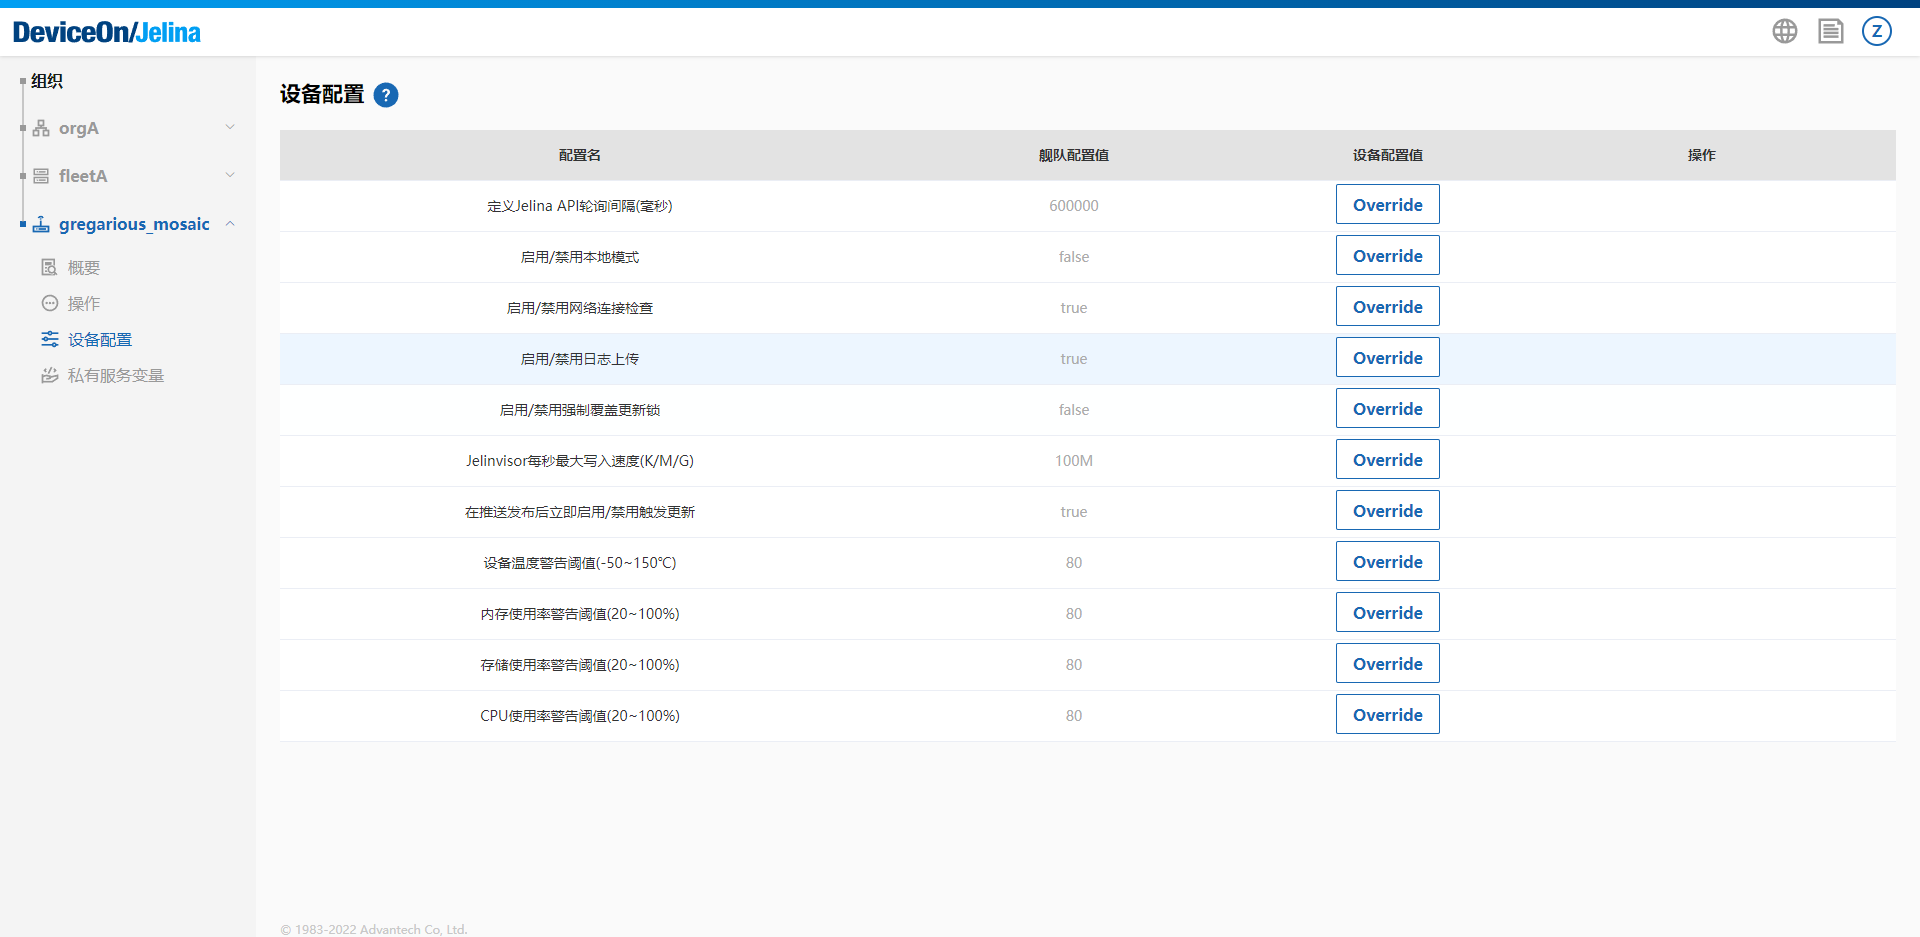
Section titled “Device configuration and service variables”Precedence: device configuration > fleet configuration
Configuration
Section titled “Configuration”- Fleet configuration: All devices follow it by default.
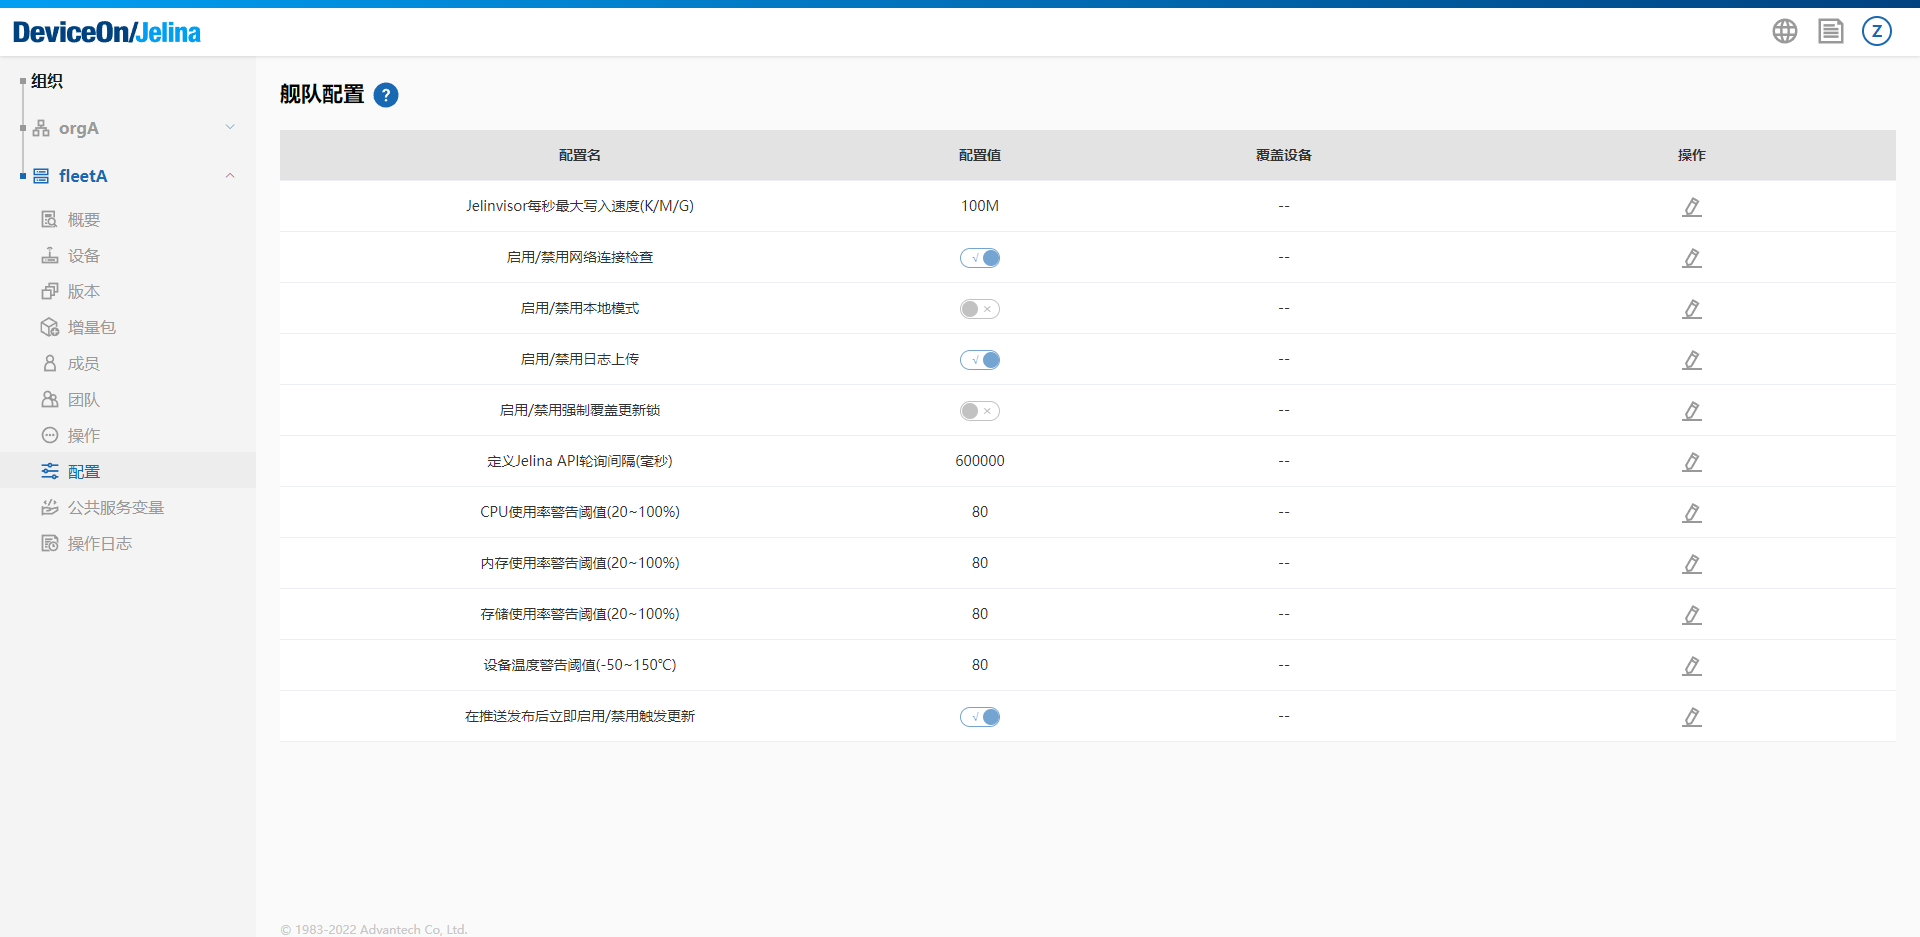
“Covered devices” identifies which devices in the current fleet use this configuration.
- Device configuration: Individual devices can set their own configuration values.
Service variables
Section titled “Service variables”-
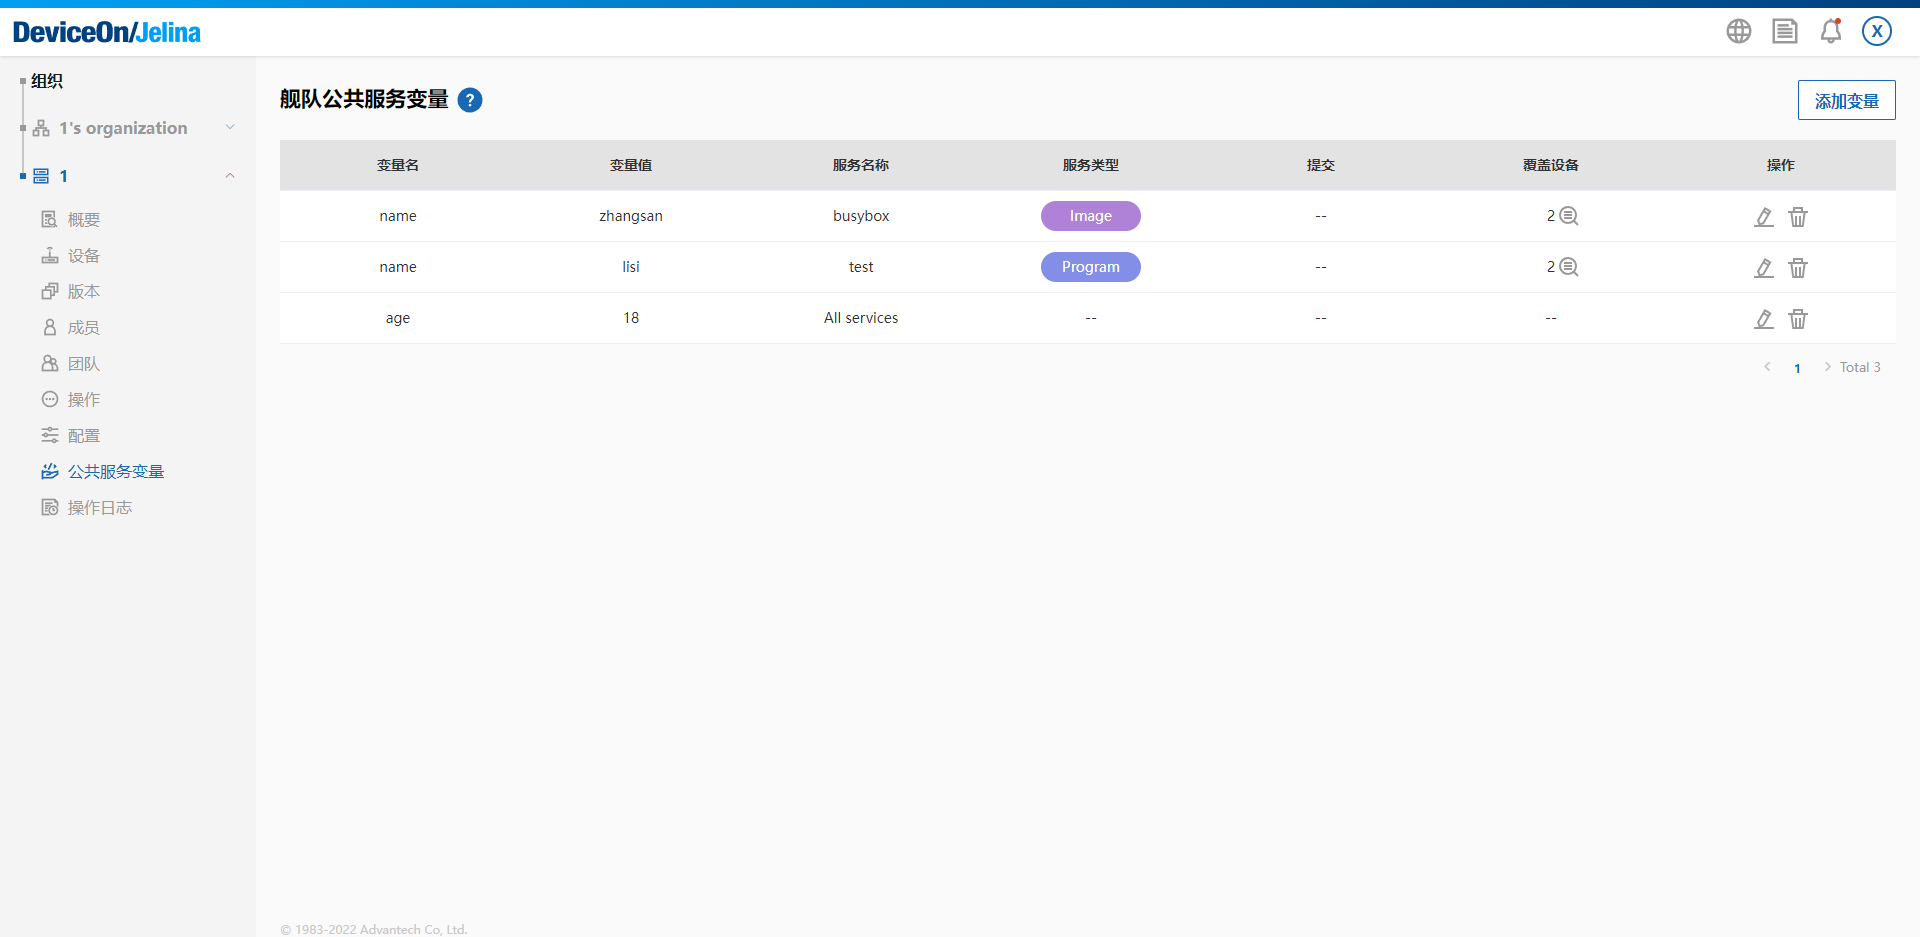
Shared fleet service variables: By default, service environment variables on all fleet devices follow these settings.
For example, setting variables a, b, and name for all services makes them available across all devices in the fleet.
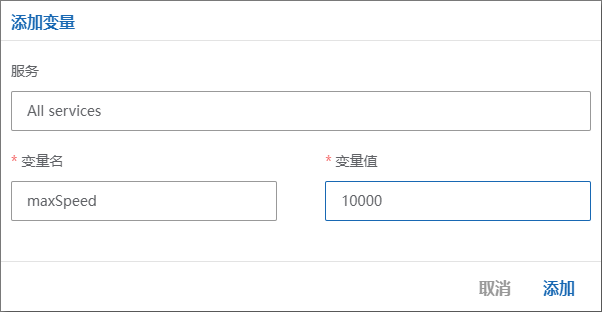
You can also configure environment variables for a particular image service:
-
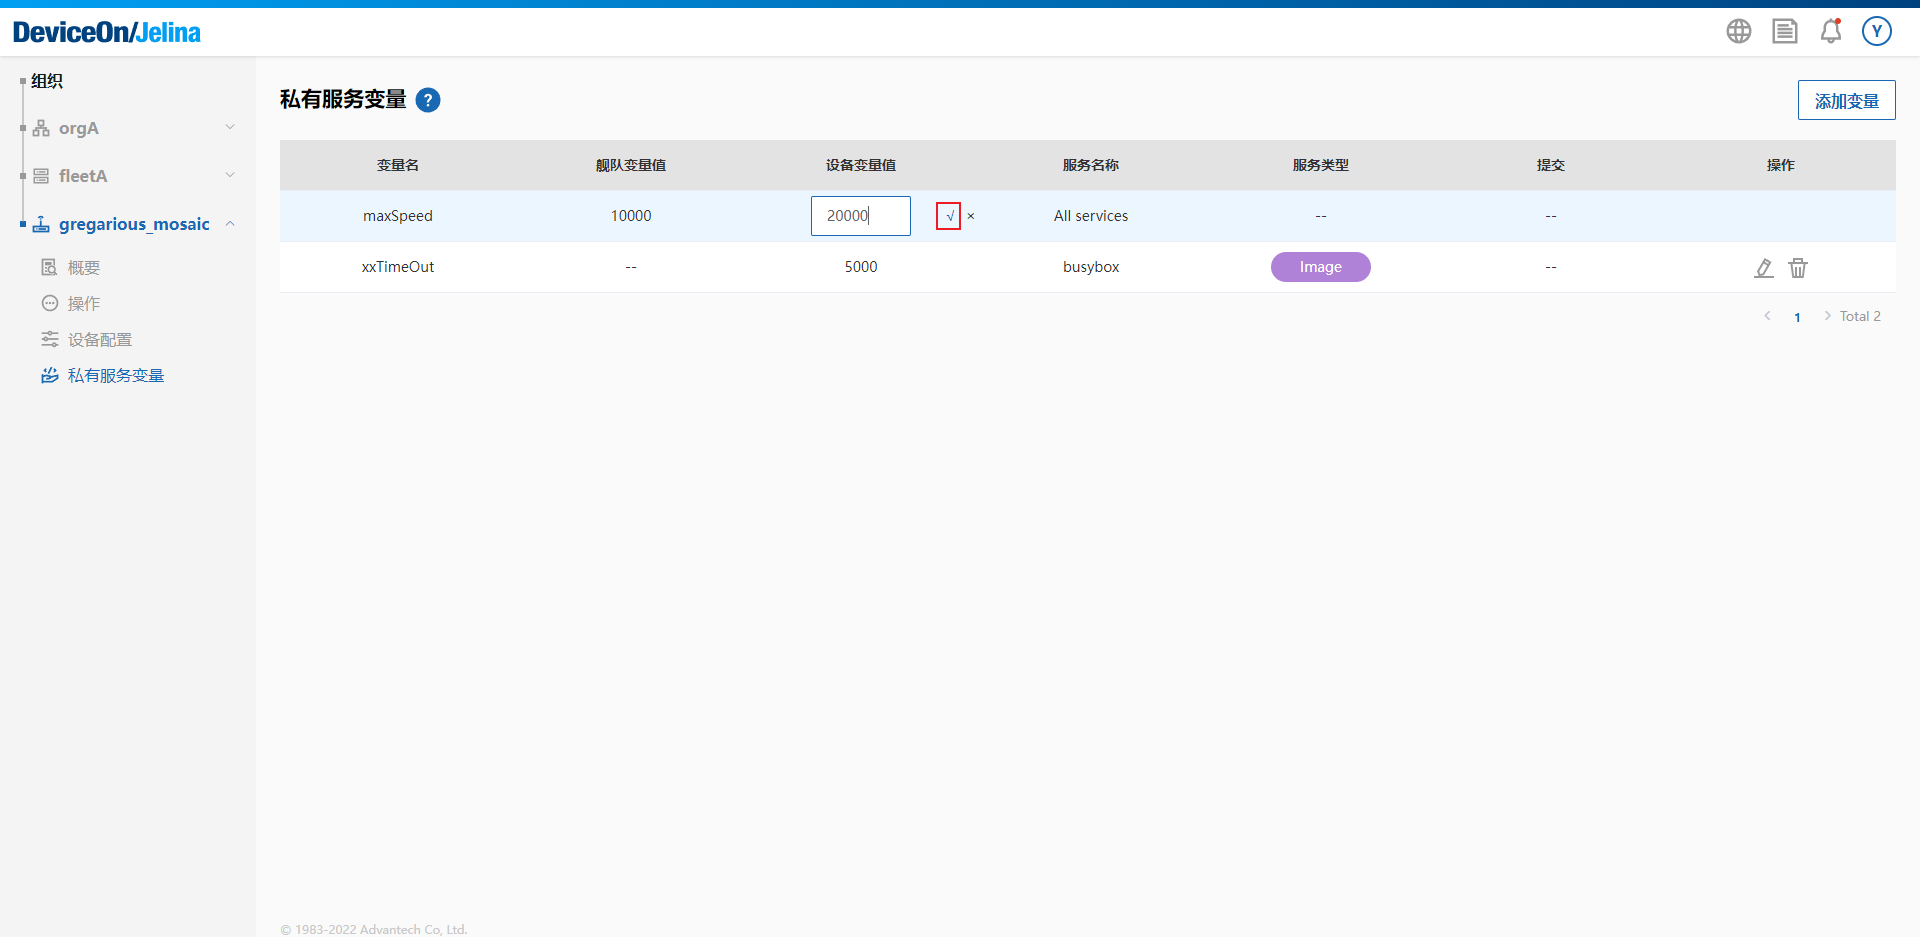
Private device service variables: Individual devices can define their own service environment values. Select override to replace fleet values for that device.
For example, override name, a, and b on one device. The new values affect only that device, without changing other fleet devices.
Additional notes
Section titled “Additional notes”-
Devices run only services present in the current release.
-
Changing fleet shared or device private variables restarts the services currently running on affected devices.
-
A local service enters
Exitedafter it finishes. -
Local services default to
restart: always. Withalways, the system attempts to restart interrupted services. Repeated restarts within a time window may result inFailed. Choose an appropriate restart policy from the supported options:
restart: Options: no,on-success,on-failure,on-abnormal,on-watchdog,on-abort,always; default: always-
Non-public container images and local services require package uploads before their release can be published.
-
A local service retains data from an older release only when its name matches the old service name.
-
To persist container service data, declare a volume mount in
compose.ymlwhen creating the release. Path-based bind mounts are not supported. -
Container names are fixed as
Service name _ Image ID _ Release ID _ Release Commit, socontainer_namecannot override them incompose.yml. -
Developer mode supports richer configuration than non-developer mode.
-
Empty Volumes in
compose.ymlmeans no volume mount is specified; it does not prevent normal container deployment.